
 I’ve started a new blog, A Pinch of This & A Dash of That. Friends often ask me for recipes but I don’t really cook by a set recipe. It’s hard to share dishes and I love to share food. What I often do is invite them over and I teach them. That way they can see how much I put in or how long it takes for the food to be done. Once they have made it twice it becomes their dish. They can claim all the praise.
Friends encouraged me to do cooking videos. I didn’t really want to. I know that’s hard to believe especially since I pretend to have a cooking show when I’m by myself. Believe it or not, I was a little nervous.
Cooking for me is creative. I love to watch cooking shows and then attempt what I see by trial and error. Everyone has different taste buds. Some people like salt and others don’t. Some people like cheddar cheese and others mozzarella.
It doesn’t matter what you like, you can always substitute an ingredient you don’t like for one you do. I usually like to make a recipe first the way it was intended, then I can have fun and change things up a bit.
I love cooking outside the box. I enjoy seeing what’s in my cabinets, putting it together and seeing if my vision and the actual taste match up.
If you’re a food lover, I hope you enjoy my new blog. Comments are encouraged and questions welcomed.
© Nadine Zawacki 2011


 Cover the cream cheese with the sides of the chicken.
 Take a slice of bacon and wrap it around the chicken. If it’s a big piece it might require two pieces of bacon. Don’t be stingy.
 Stick toothpicks on the ends to make sure they don’t open up.
 Place the chicken in a pan with some water. Bake at 350 for about 30 – 45 minutes until chicken is cooked.
 Remove chicken from pan and place under the broiler. Be very careful and watch the chicken. You want your bacon to brown, but not to burn. Turn the chicken and brown the other side.
 Finely chop half a small onion and place it in a sauce pan with butter, salt and pepper. Cook it until the onion starts to become a bit translucent.
 Add a can or two of Cream of Chicken soup.
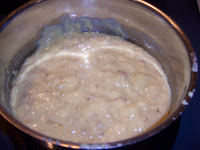 Slowly add a little bit of water to the pan until it turns into a sauce consistency.
 Remove the toothpicks and place chicken in a pan and cover with sauce. Bake chicken at 350 for about 20 minutes or so.
 © Nadine Z. 2007
 Then add tomato paste (fill the can with water and place in pot).
 Then add the meat, grated cheese, oregano, basil and parsley. I used sausage for this sauce. I find my best sauces have both sausage and meat, but this was for chicken parmesan so it wasn’t necessary. Let your sauce cook for half an hour and taste (with some Italian bread of course). See if you need to adjust seasonings. This phase is a trial and error phase. When I first started making sauce I would have Tom taste and ask what was missing. I still do that just because he likes it. The secret to sauce is the longer it cooks the better it tastes.
 We started off with a package of chicken breast.
 In a bowl add some eggs, milk, salt and pepper. Place chicken in mixture.
  Dip chicken in seasoned bread crumbs and fry in pan with olive oil (you can use vegetable oil).
 Place chicken on paper towels to remove excess oil. This piece looks like a fish.
 Place some sauce in a pan. Place chicken in pan and add some sauce to cover chicken but not completely. Sprinkle some grated cheese and cover in mozzarella.

 Thank you Hannah for sharing your evening with me. You did a great job.


 In rectangular pan place pats of butter (See below)


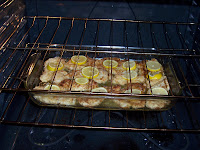 I made angel hair pasta with broccoli as a side (See below)
  Set table (wow, one package of chicken makes a big pan) (See below)
 See how nice it looks on a plate (See below)
